How to Use Deno Deploy with Azure Cosmos DB
This post has taken me way too long to write. Usually I sit down and write a post in just a few hours, but this one has been almost two weeks in the making. Not only is it pretty involved with lots of screenshots, life was a little chaotic and I ended up breaking my arm and being unable to type for a while, but the doc gave me the go-ahead so I finally got it finished!
I’ve been interested in Deno since its early days. The idea of combining the TypeScript compiler with the runtime, a linter, bundler, etc., has had me pretty excited. So when I heard about Deno Deploy I was very interested in trying it out. Deno Deploy is a platform for deploying TypeScript and JavaScript apps to the edge. By edge, they mean to many smaller data centers that are closer to the users who will be using the apps and services. If you’re curious, you can see the list of all those locations here.
The problem with running applications at the edge becomes all about how to manage your data. With compute distributed across the globe, in order to maintain the advantage of running things at the edge, you also need your data sources to be distributed closer to those edge functions as well. While you could have a single database in a main datacenter, and you might see performance benefits just due to the fact that the connections between the edge compute region and the database might be faster than going over the open internet, the best option is to have the data sit closer to the user as well. This got me thinking, Azure Cosmos, is a no-sql managed database that’s geo-replicated to multiple regions around the globe. Why not use Cosmos as a backend for edge functions?
I tried this idea, and ended up with an API that was able to respond in around 50ms on my pedestrian rural internet connection, and in the remmainder of this blog post, I’ll walk you through how I built it.
The example below is of a very basic Pizza Ordering API. It has the ability to create orders, update their status and then delete them from the system at a later time.
Pre-requisites
If you’re following along, you’ll need a few things to get started:
- An Azure account for spinning up Cosmos
- An account with Deno Deploy here
- And Deno installed locally instructions here I’m using a windows machine, but you should be able to use any Linux or macOS machine to do this as well.
Setting Up Azure
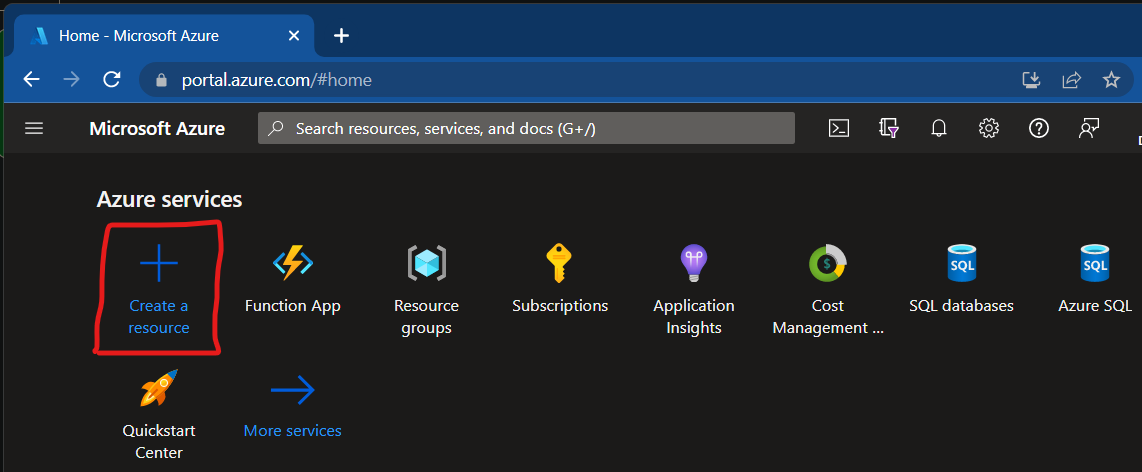
First, sign in to the Azure Portal and then click create a resource:
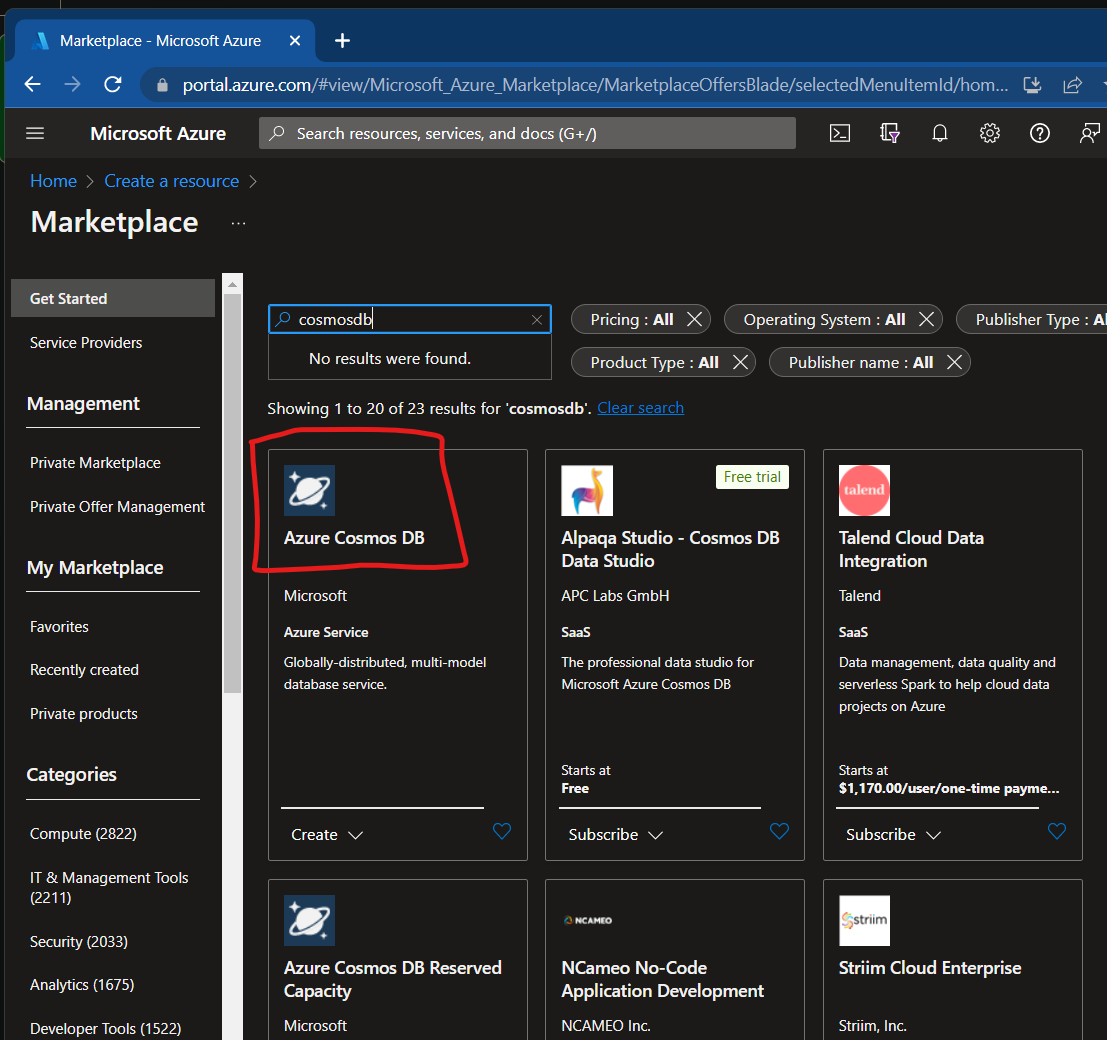
Then search for “cosmosdb” and select “Azure Cosmos DB” in the list
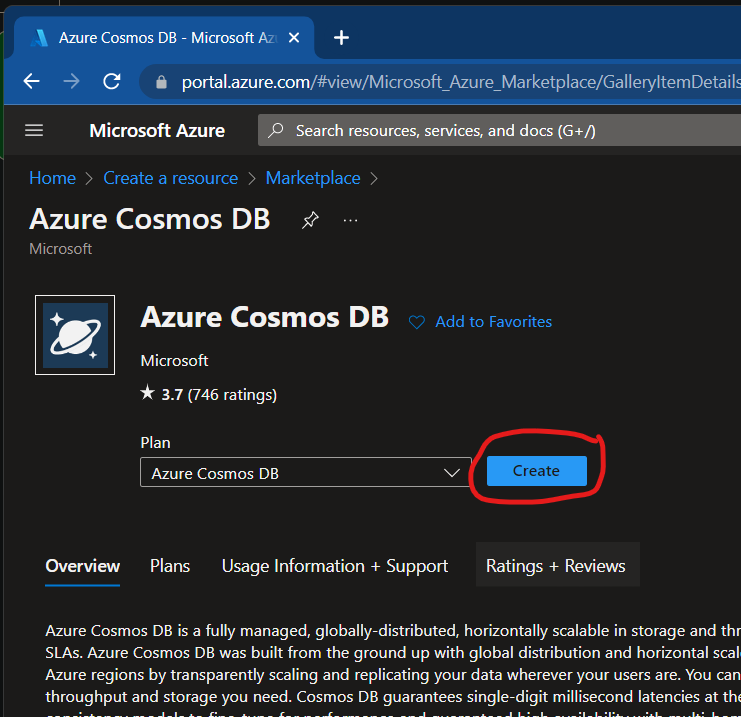
Then select “Create” on the next page:
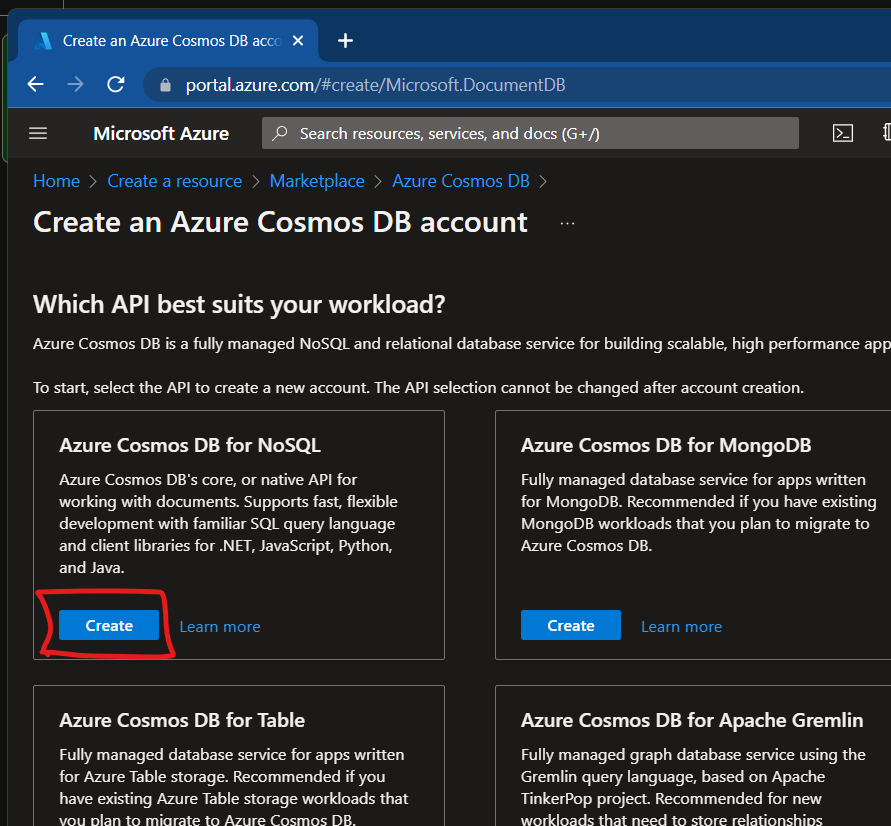
Then click “Create” on “Azure Cosmos DB for NoSQL”
Create a new resource group called “ThePizzaFarm” and then call the account “thepizzafarm-<

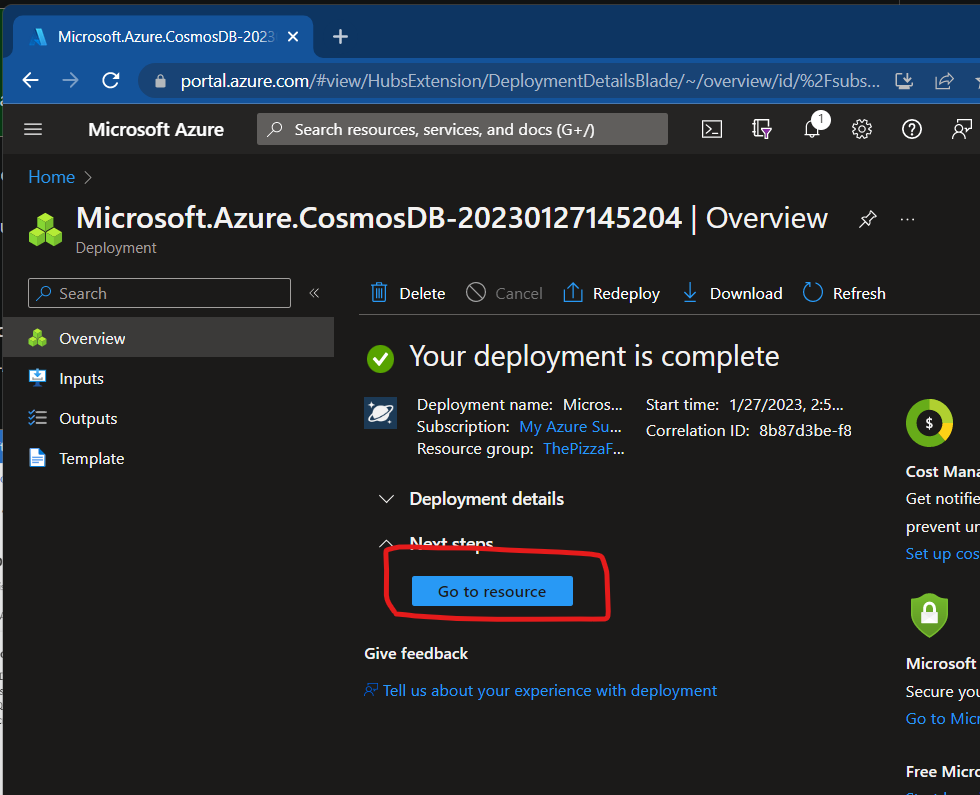
After this, Azure will deploy out the database and create a new Cosmos instance. It usually takes a couple of minutes to complete. After the deployment finishes, click on “Go to resource”
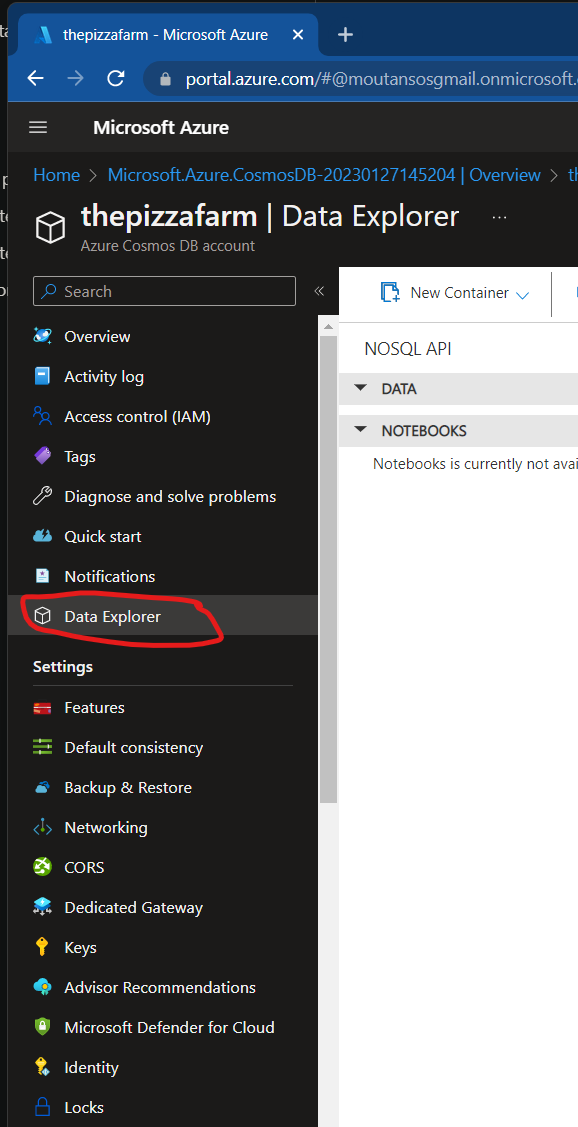
Then click on the “Data Explorer” in the left navigation column
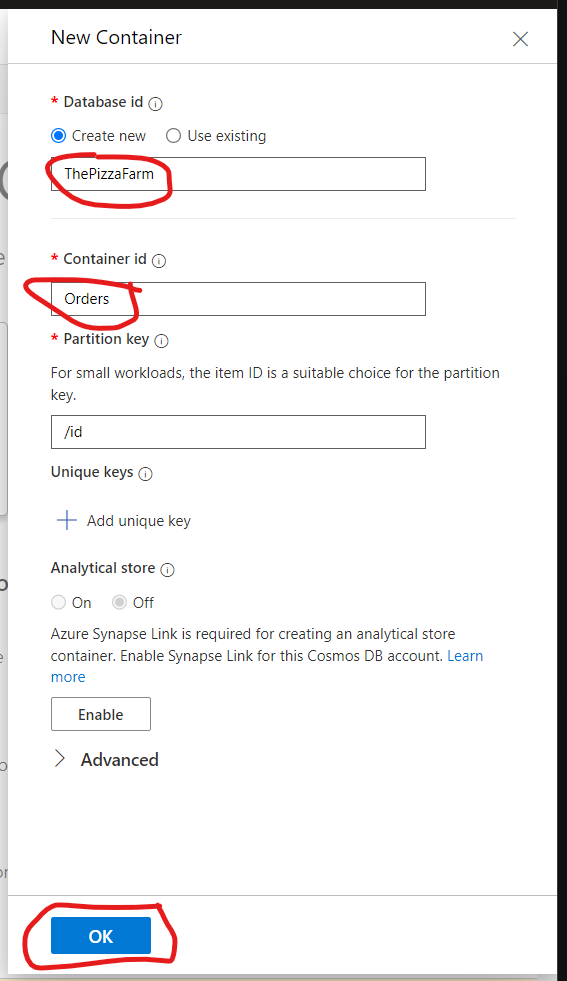
On this page, select “New Container” and then “New Collection” and input “ThePizzaFarm” for the database id, and then for the container id input “Orders” and then click OK
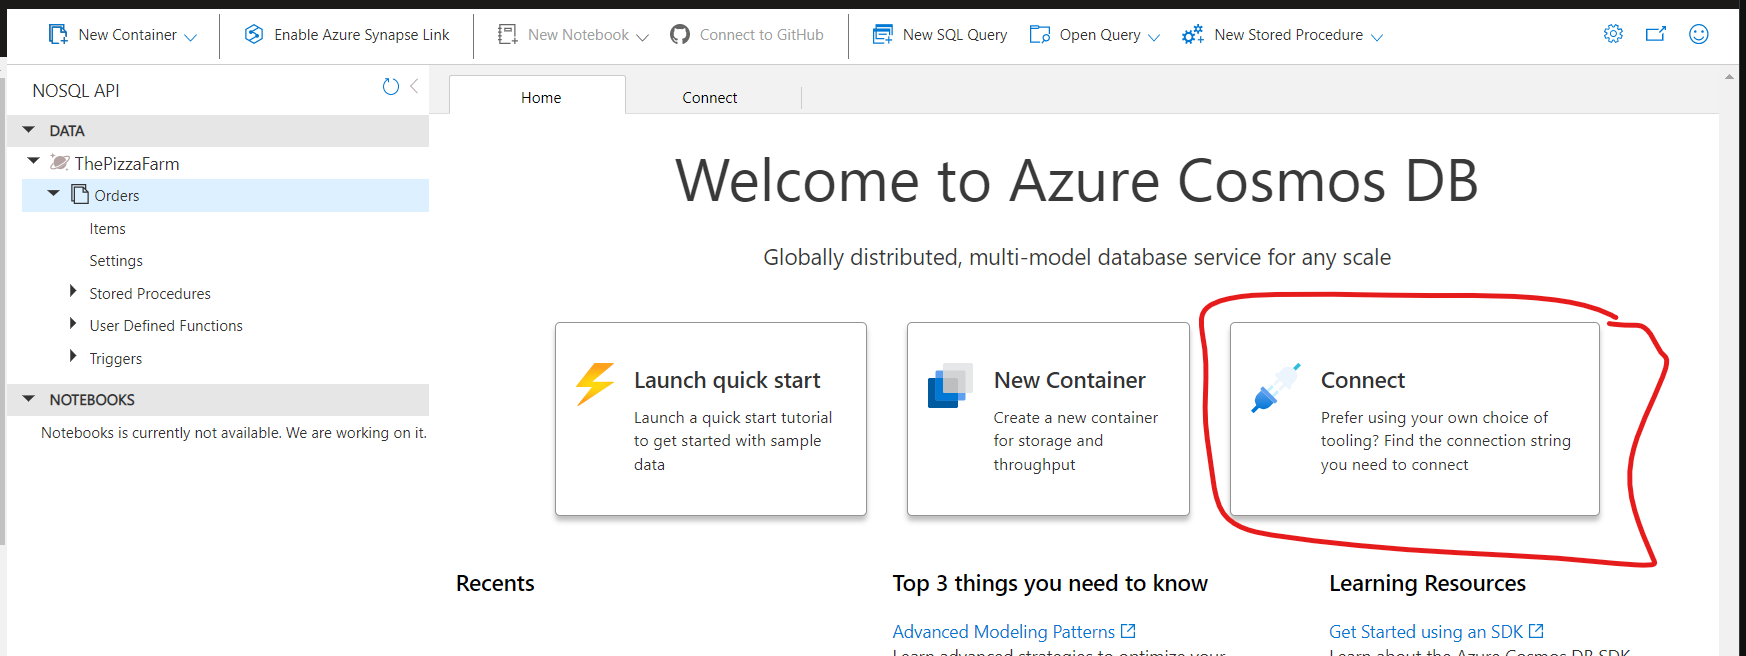
Then click on the “Home” tab and then click the “Connect” button. On the next screen take note of the “Primary Connection String”. It should start with “AccountEndpoint=…”
And with that you have set up an Azure Cosmos database.
Setting up Deno Deploy
Next, we’ll setup Deno Deploy and get a basic Hello World endpoint up and working.
Sign in to your Deno Deploy account, and then click on “New Project”
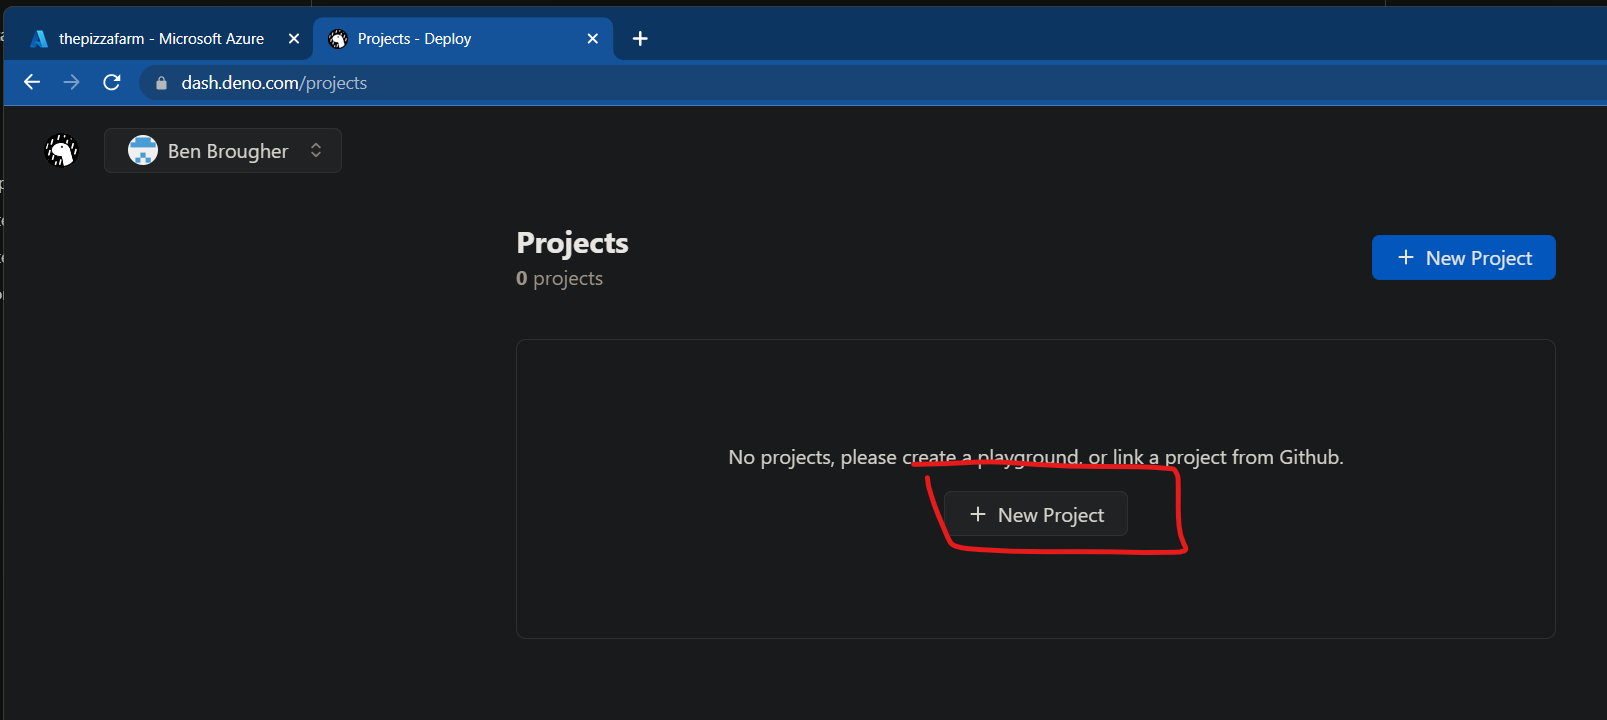
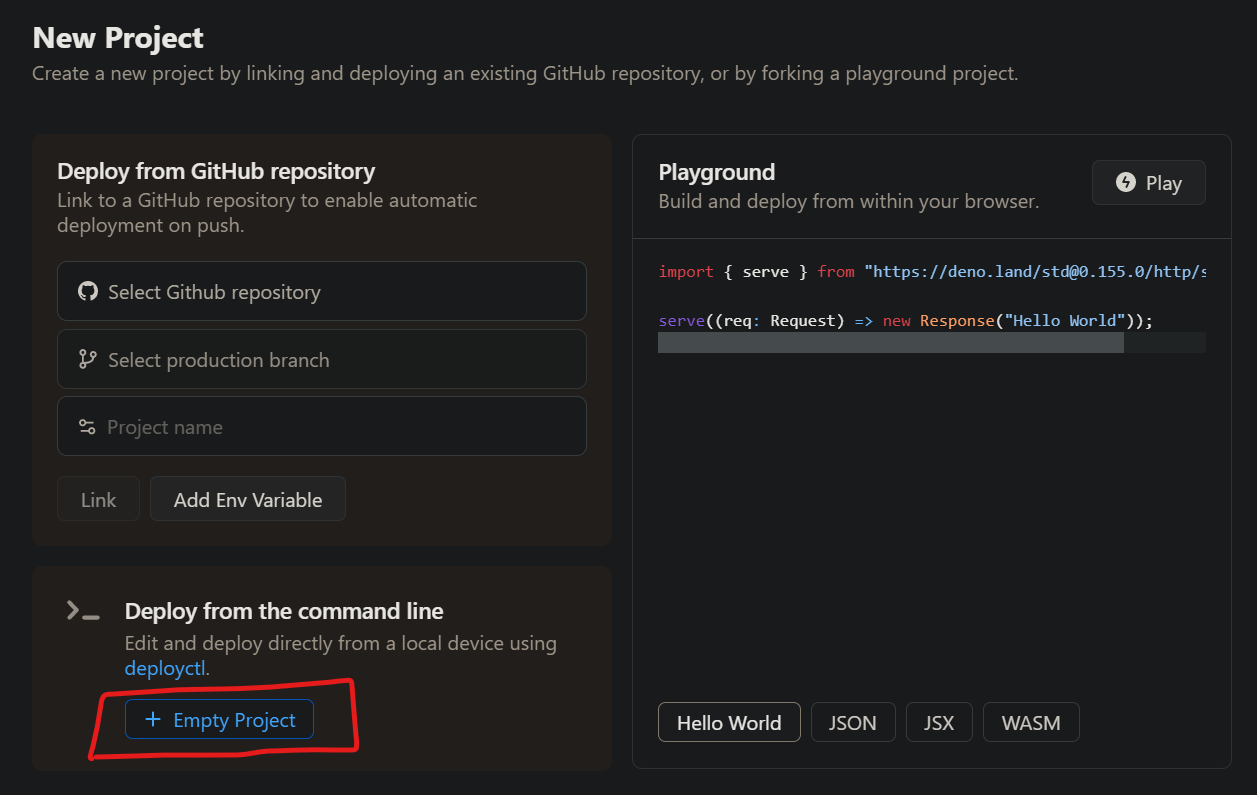
Then click on ”+ Empty Project” in the “Deploy from command line” section
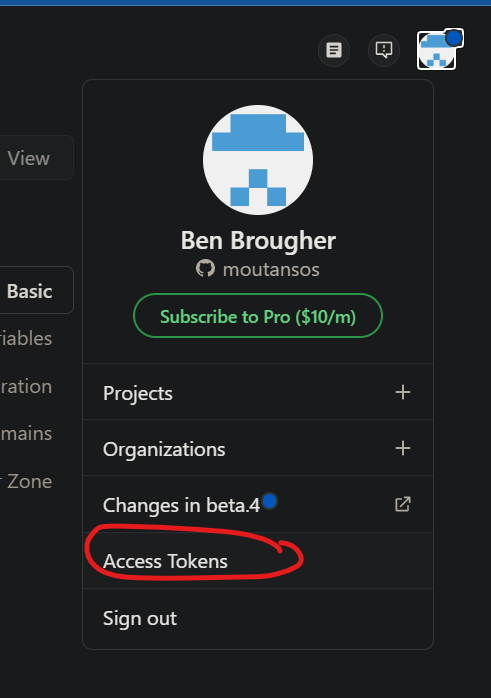
Open the profile menu at the top right and click “Access Tokens”
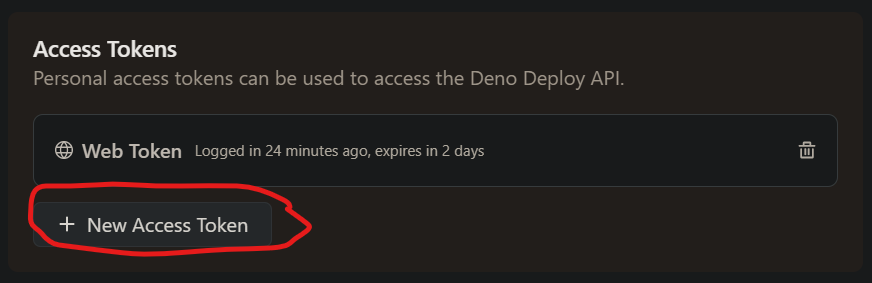
Then in the “Access Tokens” section click ”+ New Access Token” and for the description call it “Deployment” and then take note of they key.
 Now Navigate back to the project that you created earlier.
Deploying a Hello World API
Now we need to install the deployctl tool and deploy out a small starter app. Create a folder on your local machine for your project and open a terminal in that directory. We’ll need it in a second.
Then in that directory create a file called main.ts with the following contents:
import { Application, Router } from "https://deno.land/x/oak/mod.ts";

const router = new Router();
router
  .get("/", (ctx): void => {
    ctx.response.body = "Hello World!";
  });

const app = new Application();
app.use(router.routes());

app.addEventListener("listen", (e) =>
  console.log("Listening on http://localhost:8080");
);

await app.listen({ port: 8080 });
This code creates a small web app running the oak framework. If you’ve ever used express.js with Node.js it’s a very similar development experience. We can now run this small app locally and make sure it works.
In the terminal type:
deno run --allow-net ./main.tsNow you should be able to call the API at http://localhost:8080. Now that that’s working, lets push it up and run it on Deno Deploy. First run the following command to install the deployctl tool.
deno install --allow-read --allow-write --allow-env --allow-net --allow-run --no-check -r -f https://deno.land/x/deploy/deployctl.ts
After this, take the token you saved from above, and set it to an environment variable on the command line:
# PowerShell
$env:DENO_DEPLOY_TOKEN="<<token>>"
# Linux/macOS
export DENO_DEPLOY_TOKEN=<<token>>
Now run the following to deploy the app:
deployctl deploy --project=<<project name>> ./main.tsYou should now see in the terminal a URL for your app.

This URL is not a production ready URL. By default, Deno Deploy creates a new URL for every deployment, then when you’re ready to push out a production deploy, you can click “Promote to Production” to make that URL match your project name. Use that URL and see if it works. You should see “Hello World!” when you try to load it in a browser or in Postman.
Building the Pizza Farm Ordering API
Now that we have Azure Cosmos and Deno Deploy set up and working, we can start to connect the two together. We need to set an environment variable on the server side to hold our connection string for Azure Cosmos.
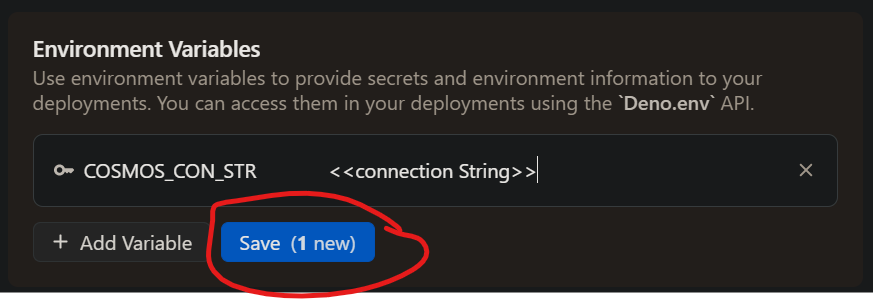
To do this, in Deno Deploy, navigate to “Settings” and then click ”+ Add Variable”
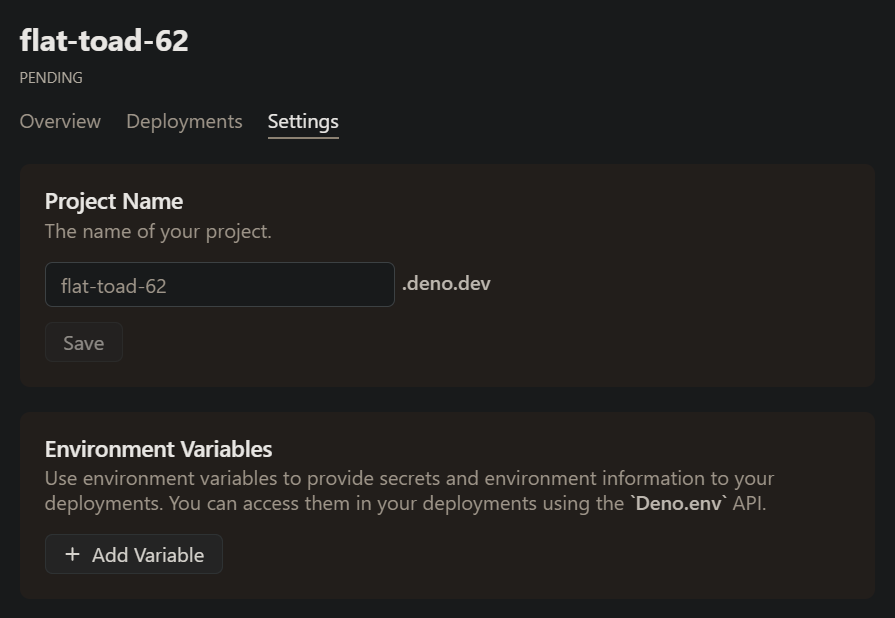
Then input “COSMOS_CON_STR” as the key and then your connection string from above for the value
Next, we need to start getting the model files that represent our data set up. Create a file called models.ts with the following contents:
export enum Size {
  Small = 'small',
  Medium = 'medium',
  Large = 'large',
}

export enum PizzaType {
  Cheese = 'cheese',
  Pepperoni = 'pepperoni',
  Sausage = 'sausage',
  Hawaiian = 'hawaiian',
}

export enum OrderStatus {
  Placed = 'placed',
  InProgress = 'inProgress',
  OutForDelivery = 'outForDelivery',
  Delivered = 'delivered',
}

export interface PizzaItem {
  size: Size;
  type: PizzaType;
}

export interface Order {
  id?: string;
  customerName: string;
  items: PizzaItem[];
  status: OrderStatus;
}

export function cleanOrder(order: Order): Order {
  return {
    id: order.id,
    customerName: order.customerName,
    items: order.items,
    status: order.status,
  };
}
There are a few types of things in here. Our Order and PizzaItems objects which represent what a customer ordered, and then a few enums to define what size the pizza is, what type of pizza it is and what the status of the order is currently. Also we have a basic function at the end that cleans up the order and removes extranious fields that may be present when pulling in the data from the request. Ideally, that would be more roboust and it would validate all the input in a production application, but I’m keeping it simple here.
Next we need to update the main file to look like this:
import { Application, Router } from 'https://deno.land/x/oak@v11.1.0/mod.ts';
import {
  CosmosClient,
  PatchOperation,
} from 'https://cdn.skypack.dev/@azure/cosmos?dts';
import { cleanOrder, Order, OrderStatus } from './models.ts';
import { Status } from 'https://deno.land/std@0.152.0/http/http_status.ts';

//Added the cosmos client here and grab our connection string
const cosmosClient = new CosmosClient(Deno.env.get('COSMOS_CON_STR') ?? '');
const cosmosDatabase = cosmosClient.database('ThePizzaFarm');
const cosmosContainer = cosmosDatabase.container('Orders');

const router = new Router();
router.get('/', (ctx): void => {
  ctx.response.body = 'Hello world! Anyone hungry for pizza?';
});

// Added an endpoint for creating an order
router.post('/orders', async (ctx) => {
  const { value } = ctx.request.body({ type: 'json' });
  const orderBody: Order = cleanOrder(await value);
  const response = await cosmosContainer.items.create(orderBody);
  ctx.response.body = { status: 'Added', recordId: response.item.id };
});

// Added a general orders endpoint for getting all the orders in the system
router.get('/orders', async (ctx) => {
  const response = await cosmosContainer.items.readAll();
  const queryResponse = await response.fetchAll();
  const rawItems: Order[] = <Order[]>queryResponse.resources;
  ctx.response.body = rawItems;
});

// Added an endpoint for updating the orders status as the pizza goes from just
// being placed to in progress, to out for delivery and finally delivered
router.patch('/orders/status', async (ctx) => {
  const { value } = ctx.request.body({ type: 'json' });
  const statusUpdateBody: { status: OrderStatus; id: string } = await value;
  const item = cosmosContainer.item(statusUpdateBody.id, statusUpdateBody.id);
  const updateTransaction: PatchOperation[] = [
    {
      op: 'replace',
      path: '/status',
      value: statusUpdateBody.status,
    },
  ];
  await item.patch(updateTransaction);
  const { resource: updatedItem } = await item.read();
  ctx.response.body = cleanOrder(updatedItem);
});

// Added the delete endpoint for deleting the order from the system when it's no
// longer needed.
router.delete('/orders', async (ctx) => {
  const id = ctx.request.url.searchParams.get('id');
  if (!id) {
    ctx.response.body = {
      status: 'Id not specified in the search params!',
    };
    ctx.response.status = Status.BadRequest;
    return;
  }
  await cosmosContainer.item(id, id).delete();
  ctx.response.body = {
    status: 'Deleted',
  };
});

const app = new Application();
app.use(router.routes());

app.addEventListener('listen', (e) =>
  console.log('Listening on http://localhost:8080')
);

await app.listen({ port: 8080 });
That’s quite a few changes! Lets deploy this out to deno deploy like we did earlier and then lets test it out!
Testing
Grab your URL from your deploy and get your favorite way to make API calls ready. (I like Postman myself)
Create an Order
First we’ll create an order. In the real world this would likely be called by a web app after the users submits an order.
URL: https://<<my deployed function>>.deno.dev/orders
Method: POST
Request Body:
{
    "customerName": "Elroy Jetson",
    "items": [
        {
            "size": "medium",
            "type": "pepperoni"
        }
    ],
    "status": "placed"
}
Expected Response:
{
    "status": "Added",
    "recordId": "<<record id will be here>>"
}
List the Orders
Then we can list out the orders. I can imagine this data being pulled in by a screen at the store to show the employees what orders are coming in and what their status is.
URL: https://<<my deployed function>>.deno.dev/orders
Method: POST
Expected Response:
[
    {
        "id": "<< same record id from above will be here >>",
        "customerName": "Elroy Jetson",
        "items": [
            {
                "size": "medium",
                "type": "pepperoni"
            }
        ],
        "status": "placed",
        .... azure cosmos fields ....
    }
]
Update the Order’s Status
While the pizza is being made, the employees in the shop need to be able to update the status of the order when they start making it and when they send it out for delivery. This request could be made by a computer or tablet in the store, or by the delivery driver on their phone.
URL: https://<<my deployed function>>.deno.dev/orders
Method: PATCH
Request Body:
{
    "id": "<< record id from above >>",
    "status": "inProgress"
}
Expected Response:
{
    "id": "<< record id >>",
    "customerName": "Elroy Jetson",
    "items": [
        {
            "size": "medium",
            "type": "pepperoni"
        }
    ],
    "status": "inProgress"
}
Delete the Order
Once the order’s been delivered, the employees would probably like it to be taken off their screens. Lets make the request to delete the order.
URL: https://<<my deployed function>>.deno.dev/orders?id=<< record id >>
Method: PATCH
Expected Response:
{
    "status": "Deleted"
}
Conclusion
If you were following along and made it through all of that, you should be able to submit orders to the API, and then read out all the orders, then update the status of that order and then delete it once it’s ready to be purged from the system. While functional, this API isn’t production ready. Next steps would probably be to add some stronger data validation with something like zod. But from a scaling perspective, hundreds of thousands of users from around the world could request thousands of pizzas from around the globe in milliseconds. All thanks to our database and our compute being distributed across the globe.
Remember to clean up your resource group in Azure after your done so you won’t be charged much!

Written by Ben Brougher who lives and works in the Pacific Northwest developing solutions to problems (usually with software). He graduated 2020 from Eastern Washington University as a Computer Science Major, Bachelor of Science (BS), and works engineering and developing software solutions in the enterprise telecommunications industry.